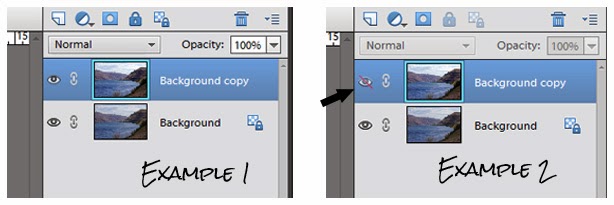
So on the last post we got to the point where we have one (duplicated / non-original) image up on the screen and have created a duplicate background layer.
For the purpose of this demonstration I've grabbed a different image that is a more typical landscape shot.
So the way I work is that I'm going to leave my background layer alone and do all of my editing with layers on the top of it. This will make more sense as we go along, but for now just make sure you've clicked on the copy layer and that it's highlighted.
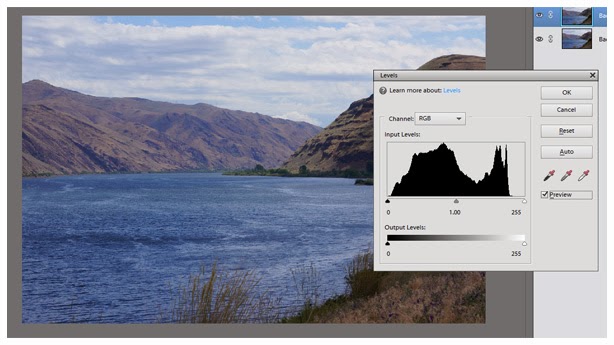
Probably 99.9% of the time the first edit I make (or at least look at) is "Levels". Most digital images have a bit of a grayish haze in them. It varies depending on the lighting conditions the photo was taken in and sometimes with perfect conditions you may not get it at all. But most often it's there to some degree and you may not even realize it until you take a gander at the "Levels" tool... So go to "Enhance", "Adjust Lighting" and "Levels". As you can see from the screen shot above CTRL+L is the shortcut if you'd rather use that.


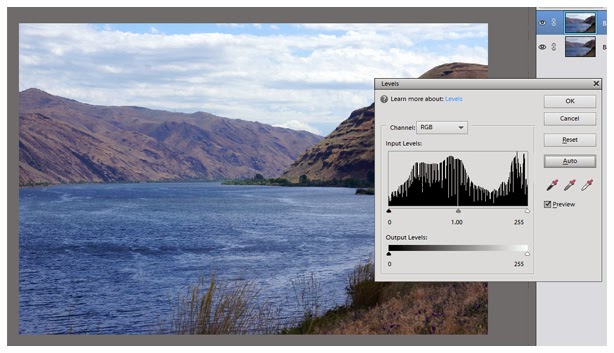
This time I'm happy with "Auto", but there will be lots of times it just doesn't quite do the trick or doesn't even come close. So surprise, surprise... next up we'll tackle "Levels Adjustments".


This post is SO helpful. I am very comfortable using 'levels', but I have not been using this layers method, and it's wonderful. Also, your visual aids are very easy to follow.
ReplyDelete